How to Tie a Tie: Easy Step-by-Step Guide for Beginners
Learn how to tie a tie with simple step-by-step instructions. Master the classic necktie knot for interviews, weddings, business meetings, and formal events.
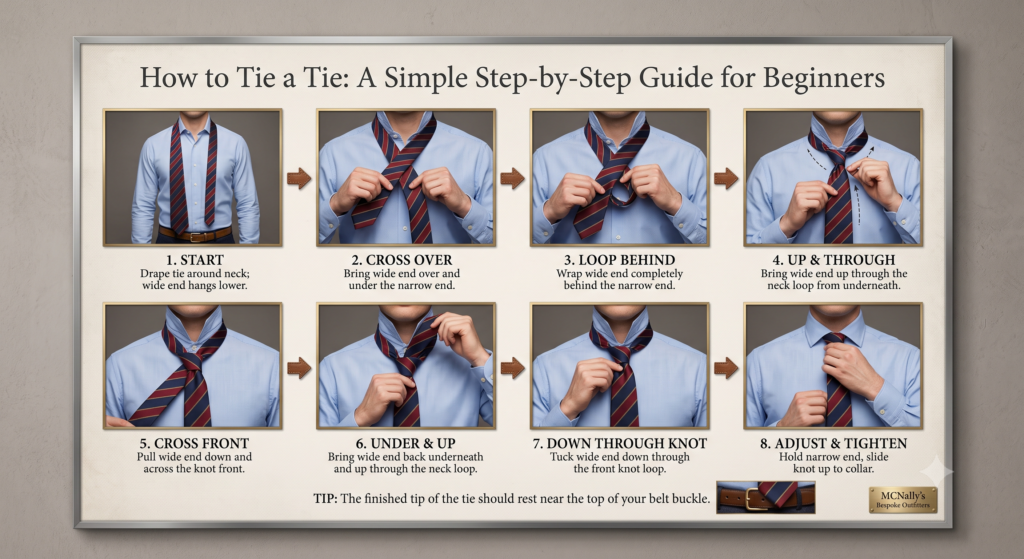
Photo Credit: Google Gemini
How to Tie a Tie: Easy Step-by-Step Guide for Beginners
A well-tied necktie can instantly enhance your appearance, whether you’re attending a job interview, business meeting, wedding, or formal event. While tying a tie may seem complicated at first, learning a basic knot takes only a few minutes and can become second nature with practice.
This guide explains the easiest way to tie a tie using the popular Four-in-Hand Knot, a versatile style suitable for most occasions.
What You’ll Need
- A standard necktie
- A collared shirt
- A mirror (helpful for beginners)
Step-by-Step Instructions
Step 1: Place the Tie Around Your Neck
Drape the tie around your neck with the wide end hanging on your dominant side. The wide end should be longer than the narrow end.
Step 2: Cross the Wide End Over the Narrow End
Bring the wide end across the front of the narrow end to form an “X” shape just below your collar.
Step 3: Wrap the Wide End Behind
Take the wide end behind the narrow end and bring it around to the front again.
Step 4: Bring the Wide End Across the Front
Wrap the wide end horizontally across the front of the knot.
Step 5: Pull the Wide End Up Through the Neck Loop
Lift the wide end upward and pass it through the loop around your neck from underneath.
Step 6: Slide It Through the Front Loop
Insert the wide end downward through the loop you’ve just created at the front of the knot.
Step 7: Tighten the Knot
Hold the narrow end and gently slide the knot upward toward your collar until it fits comfortably.
Step 8: Adjust and Center
Straighten the tie and ensure the tip of the wide end reaches approximately the middle of your belt buckle.